
Welcome to another “Wacky Watercooler Blog Hop!” If you got here by way of Leanne’s blog, I know you’ve already been “wowed” by fancy folds. If this is your first stop, no worries! Our hops are circular, so you can just keep moving forward (or backward) until you get back to where you started.
The March hop features fancy folds. I’m not sure how fancy my folds are, but they’re a lot of fun! And while there are several fab folds that are super trendy and hot right now, I opted to skip them this time, because you’ve probably seen them already.
I decided to do a “Throw Back Thursday Blast From the Past” fold series. Here are my projects.

If you read my blog often, you know I babysit my beautiful, brilliant, amazing granddaughter Amelia several days a week. Amelia is learning her numbers. Her favorite is “two.” Which makes sense, because that’s her next birthday in six months. Anyway – if we start counting, “One…” she’ll say, “Two, threeeeeeee!” Often she’ll go on up to eight. Not always in order. It’s usually, “One, two, three, two, six, two, eight!” or something like that. But, hey – she’s barely 18 months old, so I think that’s pretty good.
Anyway, to help her learn her numbers and colors, I created a “snack picker.” We called these “fortune tellers,” or, more recently, “cootie catchers” (which I think is totally gross, but I’m old).

You stick your thumbs and index fingers in the triangles, and the other person picks a number. Of course, Amelia always picks 2. So you move the thing forwards and sideways two times (or 1 or 3 or 4, depending on the number. Don’t you love those Large Numbers framelits in the Occasions Catalog?). Then the person picks a color.

I used Melon Mambo, Pumpkin Pie, Daffodil Delight, Chocolate Chip, Garden Green, Pacific Point, Blackberry Bliss, and Real Red. So, basically – Pink, Orange, Yellow, Brown, Green, Blue, Purple, and Red. For now, Amelia can ask for the basic colors. But in a couple years, I expect to hear Stampin’ Up! alliteration.
After the color is picked (and I’m guessing Amelia will select “Pink,” because that’s her fave), you spell the color by moving your fingers again. Then the person picks another color.

And this is how my “snack picker” differs from our “fortune tellers” from the days of yore. When I was in fourth grade, we wrote the names of boys inside the flaps. So if you chose pink, you’d open the flap and see “Mike,” and he’s the guy you’re going to marry. (Boy, did I luck out!) I chose to write healthy snack options under my flaps. I know Miss Amelia would learn really quickly which color was “cookies” (or, as she says, “soosies”). So my options are Raisins or Strawberries, Cheese or Yogurt, Orange or Apple, and Banana or Grapes. Amelia loves all of these options, so it’s a win/win/win!
I covered each of the squares with the Schoolhouse Designer Series Paper (DSP). And the base of the Snack Picker is Garden Green card stock. It’s a little stiff at first with all the layers. You may want to make the base layer from DSP instead of card stock. But it does loosen up after awhile, and it’s easy to use. The pattern is in the “Fancy Folds” page on my blog.
I also decided to make a little flower basket. It’s super easy, and you don’t need any extra tools for the basic basket except for a bone folder and a paper trimmer.

This is the basket Stampin’ Up! demonstrators made before we had the Big Shot. And I just want to add, when Miss Amelia saw it, she went crazy! She wore it around the house like a purse, and it was a perfect container for her “soosies.”
It’s a super easy basket to make. You just need a square with dimensions that are divisible by three. It can be 6″ x 6″, or (if you have 12″ square paper) 9″ x 9″ or 12″ x 12″. I don’t have an 12″ square card stock right now, so I decided to use a 7-1/2″ square divided into three 2-1/2″ sections. You can get as “math-y” as you want. But 1/2″ increments were all I could handle the day I made this.
Simply cut the square (7-1/2″ x 7-1/2″), then score so you have three rows of three squares each (every 2-1/2″ for this one, and you score vertically and horizontally). Cut on one side from the bottom to the first horizontal score line on both vertical lines. Turn the paper 180 degrees, and repeat on the opposite side. Then just fold the sides up and secure to form a basket. Easy!! I glued the edges, then added Candy Dot Brad Bases for extra security. Instead of Candy Dots, I added It’s My Party Enamel Dots to the centers. For the handle, I cut a strip of Mossy Meadow, then covered it with Botannical Builder Framelits die-cuts. The pattern for this is also on the “Fancy Folds” page.
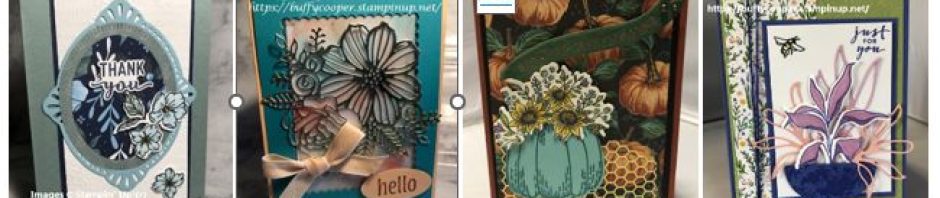
Here’s my last project.

I used the Timeless Textures set from the Occasions Catalog for the background. The rosette is my “fancy fold.” It’s a fun addition to a project. Simply score a strip of card stock, accordion fold it, then adhere the ends to form a circle. Flip and smoosh until it’s a rosette, then quickly glue it to a punched circle. Glue another punched circle to the other side, then cover with a pretty embellishment – like the a die-cut or two from the Botanical Builder Framelits Dies.
I added a Word Window punched sentiment to a Washi Label punched layer, and some Mint Macaron ribbon, as well as some of the Botannical Gardens Designer Washi Tape. My rosette is created from a strip of Botannical Gardens Designer Series Paper scored every 1/2″.
So – I’m folded out! Your next stop is the talented Marie! I know you’re going to see some awesome projects on her blog.
Thanks for stopping by Stamping with Buffy. Have a wonderful day!
Marie’s Blog
Leanne’s Blog

Hop Home Page


Pingback: Wacky Watercooler March Blog Hop | libbystamps
I’ll bet Miss Amelia loves that “snack picker”. The colors are so bright and cheerful. You’re other projects are gorgeous.
LikeLike
Thanks, Christine. She does like it! (She thinks it’s a puppet.)
LikeLike
Oh, my gosh, Buffy! All WOW projects. Your ‘snack picker’ is wonderful – I remember playing with those when I was a kid – don’t remember how to make one – will have to check out your tutorial.
LikeLike
Thanks, Gail! I had to look up the directions too. It’s been a long, long, LONG time! sigh
LikeLike
Your basket and card are beautiful. But what caught my attention is the wonderful “snack picker”. What a creative way to teach your granddaughter about numbers, colors and making good food choices Buffy. Besides being a great teaching tool, it is very festive and fun to look at!
I also remember the “snack picker” as a child and now I want to make one!
LikeLike
Thanks, Marie! It was a lot of fun to make.
LikeLike
Thanks, Marie. She does love it. She tried to feed it raisins today.
LikeLike
Buffy, these are simply great, creative, unique projects. Love the snack picker and basket. The card is so “Puffy” and fun!
LikeLike
Thanks, Jackie! “Puffy” is right! It’s one of those cards you hand to someone instead of mailing.
LikeLike
Very, very cute set of projects! Love the fortune teller! Takes me back! Great one to put in the mix here. I remember making these baskets to when I first became a demo! Such fun!
LikeLike
Thanks, Libby!
LikeLike
Great projects, Buffy! My favorite is the basket full of flowers.
LikeLike
Thanks, Marsha. Kudos on your wonderful admin abilities!
LikeLike
What is a “soosie”
LikeLike
It’s “cookie.”
LikeLike
Ameilia sounds like a sweetheart! Love how she pronounces her words and how she counts. She certainly sounds talented at 18 months. All three projects are absolutely awesome Buffy and I appreciate the links. The snack picker takes me back down memory lane too. We just had white paper back in those days but we’d colour it all up and play with those for hours. Can’t remember what we called them, but it wasn’t either of the names you suggested.
LikeLike
Thanks, Penny! She is a sweetie, and I treasure every single second I have with her.
LikeLike
Buffy these are all great folds! That snack picker totally brought me back to me school years too. Thanks for the quick trip dowm memory lane. Your granddaughter will be speaking in Stampin’ Up! colors in no time. 😉
LikeLike
Thanks, Leanne! They were really fun.
LikeLike
I love reading your Amelia stories, Buffy! They remind me so much of when my boys were little 🙂 I used to play with the ‘fortune tellers’ too – and I was grossed out when I heard that kids now call them ‘cootie catchers’! Aren’t cooties something you want to avoid?! Anyway – love your projects, and how you reminded us of some of the basics that we started with, before all the new gadgets came out!
LikeLike
Thanks, Deborah! I have lots of new stampers, so we’ve been focusing on how to make beautiful projects with fewer gadgets. It’s not easy once you’re used to the gadgets!
LikeLike
Wow. Love the folds Buffy and the stories. I’m thinking the boys names under the flap has something to do with the cootie catcher name. Love the snack idea. That might help me decide what to eat too! That’s healthy!
Thanks for the lovely trip down memory lane and more Amelia stories. Love those. Love your projects too!
LikeLiked by 1 person
Thanks, Jean! Several of the folds I thought about using are very popular right now, so I figured I’d go retro to be sure there weren’t any duplications. All three were a “blast from the past!”
LikeLike