Faux Bleached Florals

Faux Bleached Florals

Translucent Florals, Stampin' Up!, Thoughtful Journey

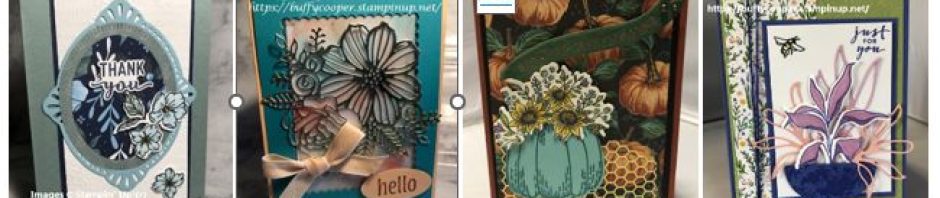
I wanted to see what the “Faux Bleach” technique would look like on colored card stock, so I used some Bubble Bath Cardstock. I stamped one of the flowers and a set of leaves from the Translucent Florals Stamp Set on the Bubble Bath layer using Versamark Ink, then embossed with white powder.

After it cooled, I used Blending Brushes to add Petunia Pop and Shy Shamrock around the flower. I used an iron to melt the embossing powder into a piece of copy paper and  layered the sponged piece to a Lemon Lime Twist Layer and then to a piece of the Thoughtful Journey Designer Series Paper (DSP). The card base is Bubble Bath Cardstock.

Since the DSP and the new In Colors aren’t available yet, they won’t be in the supply list, but you can order beginning May 1. Unless you’re a demonstrator – so here’s some exciting news for you.

Between 1–31 May, anyone who becomes a Stampin’ Up! demonstrator will receive four 2024–2026 In Color products in their Starter Kit for FREE! This is one of our richest offerings yet!

New demonstrators will receive the following products in their Starter Kit at no additional cost:

  • 2024–2026 In Color Classic Stampin’ Pad Bundle
  • 2024–2026 In Color 8-1/2″ x 11″ (21.6 x 27.9 cm) Cardstock
  • 2024–2026 In Color 6″ x 6″ (15.2 x 15.2 cm) Designer Series Paper
  • 2024–2026 In Color Stampin’ Write Markers

In addition to the In Color products, new demonstrators will pick $125 USD | $165 CAD worth of products of their choice. They will also receive free business supplies with their order and free shipping. Not to mention all the fun that comes with being a part of our wonderful crafting community. And there’s no shipping on your starter kit order.

When a new demonstrator joins, all In Color products will be automatically added to their Starter Kit. This is a huge deal. Click here to take advantage of this amazing offer.

Thanks for stopping by Stamping with Buffy. Have a lovely day!


Posted in Uncategorized | Tagged , , , , , , | 2 Comments

Everyday Magic

Everyday Magic

Sometimes you need a card really fast. You’re tired, or you’re busy, or you just don’t have the time to create a masterpiece. And, of course, you may not have all the tools you need to create what you want. That happened to me today. I spend most of the day with my grandson and daughter-in-law. I was getting ready to call it a night when I remembered it was Tuesday and I needed to schedule a blog post for Wednesday. I started to just blow it off and post something later on Wednesday, but then I remembered my newest Designer Series Paper (DSP) from my 2024 Annual Catalog preorder!

Stampin' Up!, Thoughtful Journey, Something Fancy

How gorgeous is that Thoughtful Journey paper? And every design is just as pretty – and so are the opposite sides. I cut a 3-3/4″ x 5″ piece of this design, then a 4″ x 5-1/4″ piece of Petunia Pop (a new In Color for 2024-2026) and layered it to a Blackberry Bliss card base. All that was left was to add a sentiment.

I chose the Something Fancy Stamp Set for my sentiment. I stamped in Blackberry Bliss on Basic White Cardstock, and that was it!

To create this gorgeous card, all I needed was two colors of card stock, one stamp pad, and some DSP. Oh – and some adhesive and Stampin’ Dimensionals.  So simple! Of course, you can add some embellishments or ribbon or other extras, but, honestly, the DSP stands on its own, don’t you think? This card took all of five minutes to create. We all have five minutes to spend on someone we card about, right?

This DSP (and the Petunia Pop card stock) will be available May 1, but go ahead and put the Thoughtful Journey Designer Series Paper to your shopping list. You know you’ll want it – so order early! Although it will be available through 2025, I’m guessing it will run out and have to be reordered. Do you really want to wait for it to come back in stock? No – you don’t! So get ready to order now so you can be playing with it while slower people are waiting.

Thanks for stopping by Stamping with Buffy. Have a lovely day!

Product List (Since the Thoughtful Journey Designer Series Paper and Petunia Pop Cardstock aren’t available yet, they aren’t included in the product list.)

Posted in Uncategorized | Tagged , , , , , , | 5 Comments

Faux Bleached Roses

Faux Bleached Roses

Welcome back to Stamping with Buffy! I hope you had a relaxing and fun weekend. Today, I was playing around with an old technique. It can be called either Faux Batik or Faux Bleach. I’ve heard it called by either name, and it’s a lot of fun. I had always used Glossy White Cardstock for this technique, so I tried it with Basic White – and it worked!

Stippled Roses, Stampin' Up!, Faux Batik, Faux Bleach

First, I stamped the roses from the Stippled Roses Stamp Set in Versamark Ink and embossed with White Embossing Powder. (The embossing powders are being “reconfigured,” so they’re unavailable right now, but they’ll be back!) When it was cool, I sponged Pretty In Pink, Petunia Pop, and Peach Pie ink (new in Colors for 2024-2026!) over the image with Blending Brushes. I will say that the ink blends better on Glossy White Cardstock.

For the next step, I borrowed my husband’s iron. He does the ironing in this family, because he’s much better at it. I actually have an older iron that I use for crafting, but it was at the office. So let’s keep the fact that I used his a secret! I placed a piece of copy peper over the inked/embossed card stock, then ironed until the embossing powder melted into the copy paper. This makes it look like I stamped in bleach or white ink, but this is much easier and less messy than bleach.

I stamped the sentiment on Basic White Cardstock using Shy Shamrock Ink (another new In Color) and punched with the Double Oval Punch. For the larger oval in the same punch, I used Shy Shamrock Cardstock.

The embossed/ironed layer is adhered to a Shy Shamrock layer and then to a Petunia Pop card base. Try this technique if you haven’t, or dust it off and use it again.

Thanks for stopping by Stamping with Buffy. Have a lovely day!

Product List (The new In Colors aren’t available except for Demonstrator Preorder until May 1, so they aren’t included in this list.)

Posted in Uncategorized | Tagged , , , , , , | 2 Comments

In Color Zinnias

In Color Zinnias

I decided to play with the new 2024-2026 In Colors today. Using the Simply Zinnia  Bundle, I made two cards, one highlighting the card stock and the other showing ink (in this case, Stampin’ Blends). By the way, the Simply Zinnia Bundle is an Online Exclusive item, not available in any publication.

Simply Zinnias, Stampin' Up!, 2024-2026 In Colors

Both card bases are Summer Splash with a layer of the gorgeous Thoughtful Designs Designer Series Paper (DSP) over it. The flowers on the card on the left are stamped with Cajun Craze Classic Ink, then colored with Shy Shamrock, Petunia Pop, Pretty in Pink, and Peach Pie Stampin’ Blends. The sentiment is stamped on Basic White Cardstock with Summer Splash Ink. You may be thinking, “Why Cajun Craze?” I made these at the office, and I thought I had forgotten to pack Memento Ink. After I finished both cards, I realized I hadn’t forgotten. It was right there in my bag. But the Cajun Craze looks ok – and it’s not a color I use a lot, so it was nice to break it out!

For the card on the right, I stamped the Pretty in Pink, Peach Pie, and Petunia Pop Cardstock with the same color ink, and the leaves with Shy Shamrock on Shy Shamrock Cardstock. Again, the sentiment is Summer Splash Ink.

I’m loving these colors, and you’ll be able to purchase them beginning May 1, 2024. Which card is your favorite – the card stock one or the ink one?

Thanks for stopping by Stamping with Buffy. Since the In Colors aren’t available except as a Demonstrator Preorder right now, I’m not able to link to them. But this won’t be the last post with In Colors, I know! (And again, thanks, Susan Horr, for the awesome graphic!) Have a lovely day!

Posted in Uncategorized | Tagged , , , , , , | Leave a comment

Most Awesome Tools

Most Awesome Tools

For our team meeting this month, Nadine was the “Make & Take” Hostess, and she hit it out of the park with this card using the Trusty Tools Stamp Set.

Trusty Tools, Stampin' UP!

We stamped the tools on the left side of a piece of Basic White Cardstock using Tuxedo Black Memento Ink. You can stamp the tools to color them, since it’s a “2-Step Stamping” set, but we used Daffodil Delight, Real Red, Smoky Slate, Misty Moonlight, and Pecan Pie Stampin’ Blends to color them.  The sentiment is stamped in Real Red Ink and layered to an embossed Real Red circle.

We adhered the circle to two pieces of the coordinating Trusty Toolbox Designer Series Paper. We added some nuts and bolds to the left Side of the card in Basic Gray Ink. This piece was layered to a Basic Gray panel and then to a Real Red card base. So fun!

This card reminds me of my Jonathan. When he was little, he loved to look at tools. He and Mike went to the Sears tool section every Saturday morning, then to Hardee’s to pick up Biscuits and Gravy and Hash Rounds. He wanted his own tools, but didn’t want “baby tools.” (He was two years old at the time.) Mike had an old tool belt that he filled with “real” tools for him. He was so cute toddling around with his tool belt and hard hat. One time, when Mike was working on something around the house, he asked Jon if he could borrow a screwdriver. Jonny was so proud to pull one out of his tool belt for Mike to use! These days, of course, his tools rival Mike’s!

Thanks for stopping by Stamping with Buffy. Have a lovely day!

Product List

Posted in Uncategorized | Tagged , , , , , | 4 Comments

Layers of Beauty

Layers of Beauty

I was so excited to have my 2024 Annual Catalog Preorder delivered last week. I ordered all of the In Color products (except ribbon, because I always forget to use it), and (among other things) the Layers of Beauty Bundle. This bundle comes with the Layers of Beauty Stamp Set and dies. It also comes with decorative masks. I almost didn’t get the bundle; I thought I could live with just the stamps and dies, but at the last minute I decided to go for it, and I’m so glad I did. They really elevate the coloring of the flowers, I think.

Stampin' Up!, Layers of Beauty, Decorative Masks

I started by stamping the floral image from the Layers of Beauty Stamp Set on Basic White Cardstock in Peach Pie Ink (this is one of the new 2024-2026 In Colors). Then I used the masks – which are numbered, so it’s easy to know which to use first! – with Lemon Lolly, Daffodil Delight, Crushed Curry, Shy Shamrock (another new In Color) and Shaded Spruce Ink. So fun! I used Blending Brushes to add the color. I thought this would be a lot of work, but I actually enjoyed it, and it wasn’t a huge amount of extra work!

I die-cut the flowers, then added them to a piece of Country Woods Designer Series Paper (also new in May), then to a Daffodil Delight Panel and finally to a Shaded Spruce card base.  The sentiment (from the Layers of Beauty Stamp Set) is stamped in Shy Shamrock.

I am loving all the new In Colors, but my two favorites (so far) are Shy Shamrock and Peach Pie. It usually takes me awhile to warm up to all of the new In Colors, but this year, I don’t need any time. I love them all!

Thanks for stopping by Stamping with Buffy. Have a lovely day!

(Note: Since many of the products I used are not available except for preorder anything new for 2024 will not be in the product list.)

Product List

Posted in Layers of Beauty | Tagged , , , , , , , | 2 Comments

Celebrate Earth Day

Celebrate Earth Day

Our stamping team challenge this month was to create a card for Earth Day (April 22). I had lots of ideas, but I decided to use the Circle Sayings Stamp Set for my challenge card.

Stampin' Up!, Circle Sayings, Earth Day

First, I stamped the image in Tuxedo Black Memento Ink on Very Vanilla Cardstock. I punched it with the 2-3/8″ Circle Punch, then colored with Stampin’ Blends. I stamped Celebrate around the waves image, also in Tuxedo Black Memento Ink.

Next, I embossed a piece of Very Vanilla Cardstock with the Painted Texture Embossing Folder and used a Blending Brush to lightly sponge Calypso Coral over the raised areas.

I stamped the Rays image in Calypso Coral on all four corners, then adhered it to a Calypso Coral card base. After I added the punched stamped image to the center, then added some embellishments. Honestly, I cannot remember what I used, but it might be 2023-2025 In Color Dots.

Thanks for stopping by Stamping with Buffy. Have a lovely day!

Product List

Posted in Circle Sayings | Tagged , , , , , , | 2 Comments

Stippled Roses

Stippled Roses

Stippled Roses, Hello Irresistible, Stampin' Up!

This was a fun card to create! I used a piece of the Hello, Irresistible Designer Series Paper (DSP). This is an Online Exclusive product. Next, I used my Stamparatus to stamp the roses. Sadly, the Stamparatus is no longer available, which is sad, because it’s the best stamp positioner I’ve ever used. If you don’t have a Stamparatus, you can use another brand of positioner to create this card. I placed the stamp on the DSP then closed the positioner to adhere the stamp. Next, I colored the stamp with Stampin’ Write Markers. I started with the Melon Mambo, colored the roses, then stamped. Next, I used a Shaded Spruce Stampin’ Write Marker for the leaves and stamped again. I kept adding ink until I was happy with the image. Finally, the last time, I spritzed the stamp with a tiny bit of water.

I stamped the sentiment in VersaMark ink on Shaded Spruce Cardstock, then embossed with White Powder. After trimming the card stock, I notched the edges and added it to the card.

I adhered the DSP to a piece of Shaded Spruce, then to Melon Mambo, and then to a Flirty Flamingo card base.

Just a quick reminder – the “Last Chance Sale” has begun. Don’t miss your chance to save up to 60% on select retiring products through the end of April. You can see all the products here.

Thanks for stopping by Stamping with Buffy. Have a lovely day!

Product List

Posted in #OnStage@Home | Tagged , , , , , | 3 Comments

Perennial Lavender Mystery Pieces

Perennial Lavender Mystery Pieces

Perennial Lavender DSP, Perennial Postage Stamp Set

The Mystery Pieces this month were so fun! Purple Fine Shimmer Dots, Perennial Lavender Designer Series Paper (DSP), Pretty Peacock and Crumb Cake Cardstock. I added Stylish Shapes Dies, Fresh Freesia and Highland Heather Cardstock, and the Perennial Postage Stamp Set. So fun!

I was trying to get back into the regular habit of blogging, but Miss Amelia had Spring Break last week. We had such a good time. We did an Easter Egg Hunt and lots of crafts at the church my mom and Beth attend, lots of shopping, cleaned out her closet and under her bed, and started working on the yard sale she wants to have in the next few weeks. Plus we picked up my aunt and took her to Wesley & Katelyn’s so she could meet Cade. We have decided the next time, I can’t go. I’m afraid I hogged him a little, but he was a little fussy and needed his “Seesa!” He loves to walk around and hear stories. He’s fascinated by how your mouth works when you’re talking to him, so I indulge him a lot.

Anyway, I dropped the ball on the blogging issue, but I had a blast with my grands!

I missed her lacrosse games Saturday, but I heard she did an awesome job! She scored several goals, they won one game, and had a great time. Her step-dad is one of the coaches, and I am so proud of both of them!

Today, Wes, Katelyn, Amelia, and Cade went on Cade’s first walk! We finally had a sunny and warmish day! He does not look super impressed, but I know they all enjoyed it!

Thanks for stopping by Stamping with Buffy. Have a lovely day!

Product List


Posted in Uncategorized | Tagged , , , , , | 5 Comments

A Little Fractured Latte Love

A Little Fractured Latte Love

“Fractured Cards” are all the rage these days. Whenever I want an easy take on a technique, I head over to Connie Stewart’s blog, Simply Simple Stamping. She is so awesome, and I love her.

For my first few tries, I used her instructions. Here’s one.

Bee My Valentine, Bee Mine, Stampin' Up!, Fractured Card

First, please ignore my ragged edges. Ick! As soon as I finish writing this, I’ll be putting a new blade into my Paper Trimmer.

Here are the dimensions (from Connie Stewart, not me!). I used a Petal Pink card base (5-1/2″ x 8-1/2″ scored at 4-1/4″), 4″ x 5-1/4″ Petal Pink Card Stock, 2-3/4″ x 2-3/4″ Petal Pink Cardstock, 2″ x 2′ Basic White Cardstock, (3) 1/4″ x 4-1/4″ strips of Real Red ( Cardstock, (1) 1/4″ x 2-1/4″ Real Red Cardstock.

Cut a 6″ x 6″ piece of Designer Series Paper (DSP – I used Bee Mine) into four pieces. Cut (1) 2-1/4″ x 2″, save the 2-1/4″ x 4″ piece that’s left, and cut the remaining 3-3/4″ piece in half so you’ll have (2) 3-3/4″ x 3″ pieces.

I lightly tacked the 2-3/4″ square Petal Pink Cardstock in the center of the 4″ x 5-1/4″ piece so I can move it if needed. Place the four strips around it, then lay down the DSP. If you like where everything is, go ahead and adhere with Multipurpose Liquid Glue. Trim the paper and 1/4″ strips then layer to the card base.

After I finished that, I saw an amazing card on Susan Horr’s blog that was even easier! And there was much less wasted paper. Take a look!

A Little Latte, Latte, Love, Stampin' Up!, Online Exclusives, Fractured Card.

I used A Little Latte DSP and the Latte Love Bundle which are new(ish) Online Exclusive products. For this design, all you need is a Pecan Pie card base, 4 strips of 1/4″ x 5-1/2″ Pecan Pie Cardstock strips, a 2-1/4″ square Pecan Pie layer and a 2″ square Petal Pink layer. The DSP is 4″ x 5-1/4″ and I layered it to the card base. Then I added the Pecan Pie square and the strips around it. SO EASY!!! Susan ROCKS!

I stampedhttps://www.stampinup.com/categories/shop-products/featured-products/online-exclusives the sentiment from Latte Love in Pecan Pie on the Petal Pink square, then layered it to the Pecan Pie square in the center of the card. I stamped the coffee cup in Pecan Pie and the coffee in Early Espresso, then colored with a Petal Pink Stampin’ Blend and die-cut with the Latte Love Dies. I added a few embellishments (also in the Online Exclusives) and the cup of coffee (or it could be tea, I guess) and I was finished. You really should follow Susan’s blog. She creates some of the most beautiful cards I’ve even seen.

REMINDER: The Online Exclusive Products will be available until they’re not. (Sorry, that’s all I can give you! It all depends on how they are selling, so go buy them!!) The Bee My Valentine Stamp Set and Bee Builder Punch are returning to the new catalog (but not at the bundle discount). All of the other products in the suite will be retiring in May, so if you love them, buy them now!

Thanks, Connie & Susan!! And thank you for stopping by Stamping with Buffy. Have a lovely day!

Product List

Posted in Uncategorized | Tagged , , , , , , , , , | 2 Comments