In Colors and Contours
Welcome to a new week, my crafty friends! I hope your weekend was amazing. Mine sure was. I had such a fun time at my card class Saturday. I had three “new” stampers, and they did an amazing job on all of their cards. And it was lovely to see “old friends” and catch up. I was hoping the cards we created weren’t too simple for my seasoned stampers, but everyone seemed to enjoy them.
On Sunday, I went out to Mom’s to catch up on some yard work. It was purely selfish on my part. My parents have several asparagus patches, thanks to the birds in the area, but they were a little overgrown with grass and weeds. I love asparagus, and the thought of it being choked out by grass made me sad. So I weeded and hoed (and picked!) the asparagus patches until it was easy to see where the new plants were so Mom’s mowers (Mike and Jon) wouldn’t mow over the plants. And it was easy to see what needed to be picked.
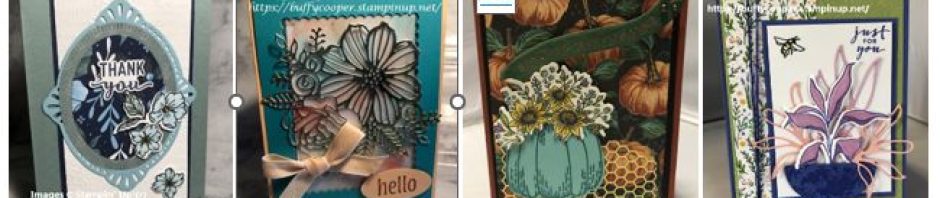
After I got home, I created another sneak peek for you. This card uses the Colors & Contours Stamp Set from the 2021-2022 Stampin’ Up! Annual Catalog and all five new In Colors. Take a look.

My idea came from a photo in the new catalog, but I added a couple original ideas. First – I wanted to use the new 2021-2023 In Colors – Polished Pink, Pale Papaya, Evening Evergreen, Soft Succulent, and Fresh Freesia. I love these colors – and not only do they coordinate with each other, they coordinate with so many of the Stampin’ Up! core colors. I love them all, and am having a hard time picking a favorite.
For this card, I wanted to create a fun background. I’m a craft supply hoarder; I’m not ashamed to admit it. I hoard my favorite supplies, because I might want to use them in a class, and if I use them too much on my “personal” cards, I might not have enough for a class. Isn’t that silly? I can buy more, right? But I have quite a bit of retired washi tape, even after I gave away a lot. So I used some retired washi tape in three different widths for this background. It’s so easy. Simply pull off enough washi tape to cover your ink pad length-wise. Place it sticky side down on your stamp pad. Press the tape into the ink pad until the sticky side is covered in ink. After I did this, I moved it an inch or two over so I’d have a little extra.
Next, place the tape over your card stock (I used a 4″ x 5-1/4″ piece of Basic White Cardstock), pressing it down and rubbing to transfer the ink. Continue with as many different colors and widths as you want. I used all five new In Colors and three different widths, but you can only see the two In Clgreens at the very top and bottom of the Ornate Layers piece.
I used the Ornate Layers Dies to die-cut the inked background. Next, I used the Evening Evergreen Stamp Pad to stamp the flower outlines from the Colors and Contours Stamp Set.
Here’s where things took a crazy turn. There’s a stamp to fill in the flower outline. I decided to use that stamp and fill in the Evening Evergreen flowers with Fresh Freesia, Pale Papaya, and Polished Pink. But after I stamped the Fresh Freesia flower, I realized it was upside down on the block. Oops! But, wait – I really like that. I liked it better than just the “fill in” flower, so I left my stamp upside down on the block for the other two colors.
The sentiment is from the Free as a Bird Stamp Set. I stamped it in Soft Succulent Classic Ink on Basic White Cardstock, then punched with the Double Oval Punch. I used the larger oval to punch a Fresh Freesia scalloped oval.
I always tell my stampers there’s always a way to cover up your mistakes, and if you see a weird placement of an embellishment on one of my cards, it’s probably covering up a mistake. Well – when I punched the sentiment, I was rushing and not paying attention, so the oval isn’t really an oval; it has a bite out of it. So I covered it with one of the 2021-2023 In Color Jewels in Polished Pink. I added another to the other side. “Oh, goodness,” I thought, “while I’m at it, just add more, because you know you’re trying to stop hoarding.” So each of the stamped flowers has three of the jewels in the center. And, oh my goodness, do these jewels sparkle! I love this card – because you know I love sparkle!
I added the Ornate Layer to an Evening Evergreen Cardstock layer, then to a Fresh Freesia card base. Finally, I added the sentiment ovals to the card using Stampin’ Dimensionals.
Thanks for stopping by Stamping with Buffy. Have a lovely day!


As, they say, there is no such thing as mistakes when it comes to card making. There is only room for embellishments! Very pretty
LikeLiked by 1 person
Thanks, Susan! (I have LOTS of opportunities for embellishments!!)
LikeLiked by 1 person
Nice to see the colors in a project!
Great week-end here too. My Granddaughter (and her mommy and daddy) came to visit for the first time! Wonderful to have both Grandchildren here together!
LikeLiked by 2 people
The colors are beautiful, and they coordinate so well. You had an amazing weekend! How fun!!
LikeLiked by 1 person
Brilliant and beautiful – I love it!
Sent from my iPhone
LikeLiked by 2 people
Thanks, Mom!! I always hear your voice in my head if I mess up or don’t have something – “Don’t panic; just improvise!”
LikeLiked by 1 person