Yuletide Cheer
Happy Monday, Stamping friends! I still have five shoebox swaps to show you – and they’re awesome! But I got to spend Friday, Saturday, and Sunday in my stamp room. Oh, the joy! Mike was showing property, and except for a mess on the dining room table (this always happens when we come home), the house looked pretty good. So I had no qualms about spending the time in my stamp room and ignoring the house. (How did I survive before Door Dash?)
I created a bunch of cards. I can’t even remember how many, but I had a ton of fun! As I was going through emails, I found a tutorial for a flip/easel card. It was so easy and so fun, I had to make one. I’m pretty sure I’ve made one of these before, but it was a good excuse to use some of my favorite Designer Series Paper (DSP) – the Feels Like Frost Specialty DSP.
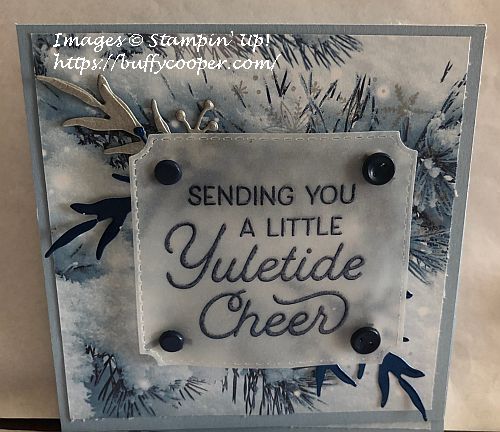
Here’s my card front.
Yeah, kind of boring, right? But look what happens when you open it.
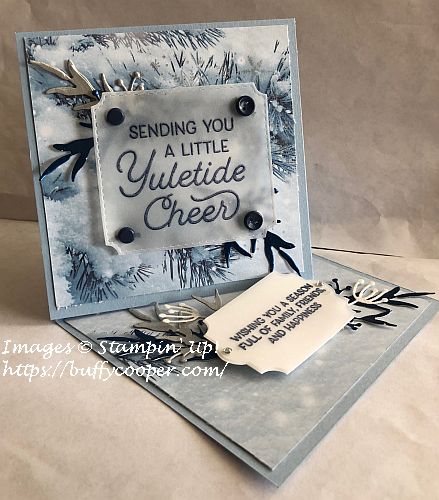
Woot! It’s a twisted fun fold!
This card is so easy to make. First, cut a 4-1/4″ x 8-1/2″ of Seaside Spray Cardstock for the base. Then score at 4-1/4″ to create a 4-1/4″ square card base. (This card will easily fit in a Medium Envelope, so you don’t need extra postage because it’s square.)
Next, score diagonally from the top right corner to the score line.
Cut one more 4-1/4″ x 4-1/4″ piece of Seaside Spray Cardstock for the front of the card. Next, cut three 4″ x 4″ pieces of Feels Like Frost DSP. Cut one in half diagonally, so you have two right triangles. Adhere one of the 4″ square DSP pieces to the inside of the card, and one on the extra Seaside Spray piece that will be the front. You can decide where you want to place the two triangular pieces. I placed one on the inside and one on the outside of the card, but it really is a matter of taste. You can even cut one more 4″ x 4″ piece, cut it in half, and then cover all the open Seaside Spray areas.
Die-cut two sets of the Frosted Frames foral pieces from Noble Peacock Foil Sheets, and one set from Silver Foil Sheets. Cut two sets of the floral filler from Sparkle Glimmer Paper.
Using the Stamparatus, stamp the Yuletide Cheer sentiment on Vellum Cardstock first in Night of Navy Classic Ink, then in Versamark Ink, making sure to clean the stamp between colors. Heat emboss with Clear Embossing Powder. This ensures that the ink won’t smear on the vellum before it dries. Plus it gives a little extra shimmer. Die-cut with the Frosted Frames frame die.
Repeat this embossing process on another piece of Vellum Cardstock with the wishing you a season… sentiment. Punch with the Everyday Label Punch. Punch another label from Whisper White Cardstock. Adhere the vellum over the Whisper White using Mini Glue Dots, then use Basic Rhinestone Jewels to cover the dots. Adhere the two vellum pieces to the card as shown, using Stampin’ Dimensionals. Hide the dimensionals on the top frame using embellishments. (I used brads which are apparently retired. But there are lots of current options that you can use.)
Note: I used two layers of Dimensionals for the “wishing you a season…” label so it would be tall enough to hold the card in place.
Fold the left triangle of the card base down, and adhere the front card piece (with the Sending you a little Yuletide Cheer sentiment) to the folded triangle. Remember, when you fold the card down, the front will be sideways! When you open it and prop it up, it will be a different orientation, so play with it a little before you adhere your card front to the base.
Thanks for stopping by Stamping with Buffy. Have a lovely day!
Product List


Wow- beautiful and what a fun week-end!
LikeLiked by 1 person
Thanks, Peggy! And, yes, it was wonderful!!
LikeLike
What a fun time and card design. It would make a great video..hint..hint.
LikeLiked by 1 person
Thanks, Ginger! And I had that same thought! Need to get back into the videos now that I have more “free” time!
LikeLike
This is a beautiful card and a fun fold! I haven’t done this one in a long time. Thanks for the reminder and the directions!
LikeLiked by 1 person
Thanks, Susan! I want to see yours!!
LikeLike
Buffy this is so beautiful! Plus, the beauty continues to the inside with that wonderful fold. Just stunning
LikeLiked by 1 person
Thanks, Jackie! The fold is fun and I really love the paper. It seriously does all the work.
LikeLike
Such a beautiful card – not boring on the front at all! A real wow when it opens up, though 🙂
LikeLiked by 1 person
Thank you, Deborah! Hope you had an awesome birthday!!
LikeLike