
It’s July, and in most places that means the weather is smokin’ hot. We’ve been getting showers every other day or so, and they cool things down a bit – until they’re over. Then it’s hot and humid. But, it’s summer, right? It’s supposed to be hot.
To cool things down a little, my friends from the watercooler and I are featuring a “Christmas in July” project in our hop this month. You may have arrived here from Debbie’s blog. It’s been fun getting to know Debbie through her blog, and I love her projects! If you are just starting out, be sure to hop all the way around until you get back here so you don’t miss anything!
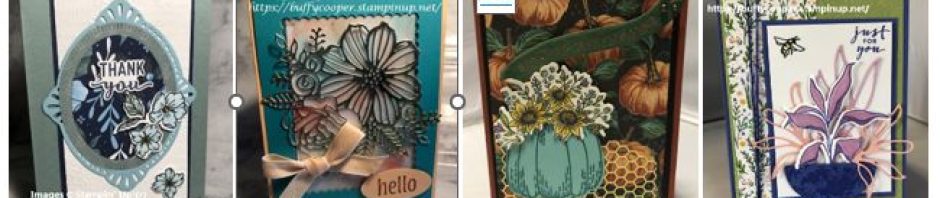
Here’s an overview of my projects.

Besides a “Christmas in July” project, we’re also creating a project using a new punch, and a new catalog CASE (Copy and Share Everything).

I decided to use Lovely as a Tree for my Christmas card. I tend to forget about this set, because it’s still on my old stamp shelf, in a clam shell case, looking very lonely. Ok, Teeny Tiny Wishes and Petite Pairs are also over there in clam shell cases. I think those are my last three “old” sets that are still current. My newer “post-clam shell” sets are lined up on a shelf over my stamp table, looking all spiffy and neat. Now that I’ve moved all my retired sets out, though, I actually have room for my three misfits. Maybe I’ll move them over this weekend.
So back to the card. I stamped the tree on Whisper White card stock with Garden Green ink. Some of the splatters in the Perpetual Birthday Calendar stamp set looked like Christmas ornaments to me, so I stamped them on the tree with Cherry Cobbler, Crushed Curry, and Elegant Eggplant. Then I added some Silver Sparkle Dazzling Details “garland” and a gold foil star to the top of the tree (from the Confetti Stars Border punch). After the Dazzling Details dried, I cut the tree out by hand (gasp) with Paper Snips.
Our town is very old, and we have a lot of historic homes downtown, so I decided to put my tree in the window of an old home. I ran Cherry Cobbler card stock through the Big Shot with the Brick Wall embossing folder, then traced the mortar with the Chalk Marker. Then I colored over the chalk with a Smoky Slate Stampin’ Write Marker to age the wall a bit.
The window is just strips of paper that I embossed with the Woodgrain folder and glued together to make a frame. I added wallpaper to the room (Cherry on Top Designer Series Paper Stack), sponged some Pear Pizzazz around the tree to cover up the white areas, and added some Cherry on Top Designer Series Paper Stack curtains. “Merry Christmas,” from Teeny Tiny Wishes (while I was over at the “old” rack, I grabbed this set too), is stamped in Jet Black StazOn on Gold Foil and punched with the Word Window Punch.

Here’s my catalog CASE. My inspiration was the gift bag on page 128.  I don’t have the Gift Bag punch board, so I decided to make a 2-4-6-8 box. It’s so simple. You score your card stock along the 8-1/2″ side at 2″, 4″, 6″, and 8″. You can make two from one sheet of card stock. I usually cut the 11″ side in half at 5-1/2″, but I wanted my bag to be a little taller, so I cut it at 6″. Add a 1″ horizontal score across all the other score lines, then clip on the 2-4-6-8 lines from the bottom to the horizontal score line – like this –

I like clipping little “v” shapes, because the box looks a little neater when it’s finished.
At the top of each upside down “V” is a vertical score line. And you can see the horizontal score along the bottom. You can cut off the short 1″ x 1/2″ tab at the bottom right, but leave the long tab so you can secure your box.
All you have to do now is decorate your box. Since my card stock was Blushing Bride, I added polka dots using the Sponge Daubers with Calypso Coral ink. I used some of that marvelous Tear & Tape adhesive to the 1/2″ tab and the bottom flaps to secure the box, then punched holes for the Blushing Bride cotton ribbon. I tied some Bermuda Bay sequin trim in the knot, added a die-cut “hello,” and die-cut a Calypso Coral heart clip with the Project Life Paper Clips Thinlits for the top. How fun would this be for a guest’s “pillow gift” this summer? You could put soap, shampoo, lotion and stuff in there – or, you could be really nice and put chocolate in it.
 So a funny thing happened on my way to the 2-4-6-8 box. I decided to make it a little wider, so I scored the 11″ side at 3″, 6″, 9″ and…oops. I must have been really tired, because, the next score would be at 12″ – and you need at least a little left over for a flap. Hmmm. So this is actually an adorable little triangular box. (Yeah. That’s what you get when you only have three score lines – a triangle.) You make it the same way as the rectangular box, except I closed both ends. This would be fun with mini Toberlerones, don’t you think?
I gave the entire piece a Cucumber Crush wash with the aqua painter and ink refill. And, yes, I dripped the refill into the ink pad lid. One of my downline hates this, I think. When we have the same stamp pads at an event, she always says, “This one is yours, because I don’t do … that.” Yeah, it does make a mess, but, hey, art is messy! And this way, you don’t have to wash ink down the drain when you clean your palette.
While the ink was drying, I stamped flowers from Garden in Bloom in Tuxedo Black Memento Ink on White Vellum card stock. In retrospect, I should have used StazOn, because it would dry quicker, but I prefer Memento, especially with photopolymer stamps. If you use Memento, be sure to let it dry before you mess with it, because it will smear. I heated mine with the heat tool, but not long enough, because it still wasn’t dry. So I turned it upside down on my scratch paper and rubbed, then moved it to a clean spot and rubbed, then moved it and rubbed until no more ink bled off. Then I colored the back with Watermelon Wonder and Cucumber Crush markers and punched with the new Washi
Label punch. What? Your punch doesn’t punch a strip that long? Yes, it does! Simply cut your paper the width of or a tinch smaller than the width of the punch, then stick just one end through the punch – like this. (The photo example is obviously not vellum. I wanted you to be able to see what I was talking about.)
 Then stick the other end in the same way and punch. Here’s a close-up of the “Faux Washi Tape.”
 By using vellum, it looks more like washi tape than if you use card stock. I put a few dots of Multipurpose Liquid adhesive behind the flowers, then taped the rest down with strips of Cherry on Top “real” washi tape. The sentiment is from the Watercolor Wishes project kit. Oh, my goodness. If you haven’t put this on your wish list, do it now. Seriously. It’s the best kit ever. I’ve liked the other kits, but this one is gorgeous. The wooden elements heart is one of the leftovers from the kit. (Yes, you’ll have leftovers to use on other projects!)
Here’s a side view of the triangle box. 
So that’s it for me. Your next stop is Jean’s Rogue Thoughts. I know you’re in for a treat. Jean has a wonderfully special way of seeing alternative uses for products or stamps, and her projects are always unique and beautiful. You can also use the buttons at the bottom of the page to move forward to Jean, backwards to Debbie, or to navigate to the hop home page and see links to all the designers.
Thanks for stopping by Stamping with Buffy. Have a wonderful day!


Pingback: June Wacky Watercooler Blog Hop: Celebrating the New Annual Catalog | Rogue Thoughts...Jean's Stamping Studio in the Rogue Valley
Buffy, what wonderful projects. Your “oops” sure make an adorable triangle box! I really love the colors. Thank you for sharing.
LikeLike
Wow Buffy all projects have a “kitchy” flare in a very happy, cheery, funky way. I will have to come back and study your work in more detail so I can give them a try,
LikeLike
Buffy your projects are so well thought out and designed. I really like that how you coloured the bricks for your first card and make it look like one of your town’s historical buildings. I would never have thought of using the splatters from the Perpetual Calendar stamp for the tree ornaments, but they work really well. Thanks for the tip. I love how your larger gift bag morphed into the triangle box…………..too cool! Thanks for sharing your wonderful talents.
LikeLike
The weather is smokin’ hot – as are your projects, Buffy! Your bricks almost look painted – wow! I love the window scene you created. You made a bag – by hand?! You’re so crafty! Thanks for sharing all your tips & tricks!
LikeLike
Buffy, what fun projects! I love, LOVE the bag. The story about the triangle box is so funny. A true stamper’s journal entry.
LikeLike
Buffy, I love the way you used that heart on the bag you’ve made! Super Cute! Great Projects!
LikeLike
Isn’t it wonderful when our oops turn into wonderful projects?
LikeLike
No mistakes, just opportunities. Triangle box is adorable.
I love your projects. I haven’t used the brick folder yet, but will now. What a great use of Lovely as a Tree.
The little heart “clip” is so cute, love the bag.
LikeLike
I visit every day some sites and websites to read articles, however
this weblog provides feature based posts.
LikeLike
I every time spent my half an hour to read this website’s posts all the time along with a cup of coffee.
LikeLike
I like how you made it look like we were looking through a window at the tree… Good idea!!!
LikeLike