Don't these colors just scream Christmas?? Well, maybe not, but I love using blues for Christmas, and I really love the Preswick Designer Series Paper – so this is what I used for a gift card holder for the boys. The tutorial can be found here. It was a Splitcoast challenge last week – and so, so easy! I think the hardest part was deciding what colors to use!

Here's the inside. Remember, it's a scan, so it will be flatter than, well…a frisbee. (I was going to say "road kill," but that's kinda gross. I just read a newspaper article about it, though. You know you're in the South when the news is about road kill!)
The part with the card actually pops up. It's really cute! You can see it better in the tutorial, because it's a photo, not a scan. And there's also a video there.
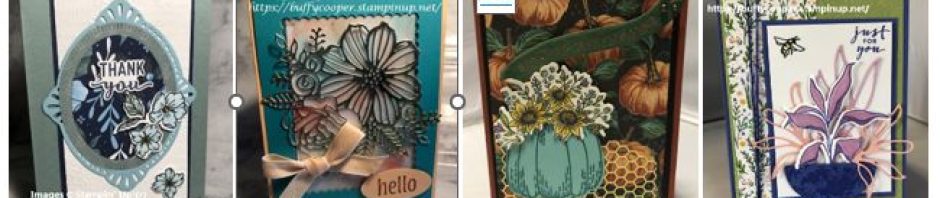
Here are more pictures of things I did today. I have to say, I'm loving the Country Living Holiday Stampin' Kit! I held off ordering, but now that I've played with it – WOW! And what a deal. You get 6 stamps, pages and pages of die cut designer paper to match sheets and sheets of chipboard shapes, designer paper that's not die cut, Whisper White card stock, a full container of glitter, a full-size Tombow Multi Adhesive, a full-size package of white taffeta ribbon and one of silver elastic cord, Pretties Kit rhinestone brads, a sheet of Stampin' Dimensionals, 3 stampin' spots (2 are craft!) a white craft refill, and a partridge in a pear tree. (Just kidding about the partridge. And the tree.) It all comes in a 12×12" craft keeper with instructions for several projects (and I can give you instructions for more). If you've ordered it, you'll love it. If you haven't, there's still time!! Call or e-mail me or go to my web site and order.
I'm showing you everything I made to atone for a week of blog silence. Life got a little crazy last week! So here you go - These aren't original, of course. The talented designers at
Stampin' Up!® had the ideas; I just copied them. But see how easy it is to look like a pro?
This is a 5×5 card. The instructions didn't call for the glitter on the star, but I figured since I was covering it with craft ink, I might as well add Heat & Stick and glitter! One can never have enough glitter. (I did get glitter all over Jonathan's final exam, though. Oops! Who knows – he may get extra points!)

Isn't the Designer Paper yummy?? Wait till you see what's coming in January!

This is an ornament for the tree – or to hang on a garland on the mantle. I love the taffeta ribbon!
Here's my favorite! With the white craft ink and glitter, the chipboard snowflake really looks like snow!

This is another of my favorites. You cover the chipboard with craft ink, then sand it. Then stamp snowflakes over it with the Old Olive craft ink. You can barely see it, but it does add a lot of depth. (I love using artsy terms!) There's more taffeta ribbon along the fold of the card, which, of course, kicked the card askew in the scanner.

This is the last one. It's a gift tag (obviously), but if you stamped something besides "To/From" on it, you could make it an ornament.
So that's it for today. Tomorrow I'm going to try to play with some new stamps. One of my stampers is letting me borrow her Christmas ones!! (Thanks, Liz!) Don't forget to order your Stampin' Kit! Find out more here.